Increase Bass Settings To Get Max Bass [Windows]

Speakers with subwoofer
Hello friends, I am back with a new tutorial. I know you all love hearing songs on your PC and I too love this hobby. Some like soft music but some people like me feel that the music is complete after getting the strong bass as expected by our speakers. After finding all settings and experimenting with apps, I am done and I have found the final solution to get the exact, perfect, less distorting and head shaking bass.

All you need is a subwoofer based 2.1 or 5.1 or 69.1 speaker, but make sure you have a subwoofer or else the normal speakers of your laptop will give drunk sound. And yes, if you have good pair of earphones which are supposed to give the same sound effect as expected by speakers, then you can try that too. My settings worked with my 2.1 Speakers and a Nokia earphone. Now get lets start the work. For clearing doubts, I am not just simply gonna show you equalizer settings but much more than that, so keep reading.

For Windows 7 & 8 Users

If you are a Windows 7 or Windows 8 user, then you are lucky as Windows 7 and 8 provides Bass enhancement. Please note, if you have installed Realtek Audio drivers then the setting will be disabled for you, in this case skip to next step. 

Now if you are using default Windows drivers for your speakers, then open Sound settings. To do so, Right click on your speaker icon and select Playback devices.

After that double click your default Audio Device. You default audio device is the one which has a green colored check sign. After clicking on it, you will entire the sound properties.

Now from the top tab, select the Enhancements tab. There you will find bass boost, check this enhancement and select the quantity of dB. The normal one is 6 dB but you can increase it to 9 dB or 12 dB but make sure that you are getting good amount of voice as increasing the base will lower your speakers voice temporarily till the settings are applied. You can trial check all the available settings.
 After switching to higher base levels, you will definitely get a increase in bass for sure.

Now, if you are feeling that you have find the right setting then you can quit this article right now, or if you are feeling that the increase in base is not making the experience complete, then you can switch to default setting and continue reading the article and I will tell you about another method which will give you balanced bass  with more settings and least distortion.

AIMP3 Player, The extreme music tool

Aimp3 music player is the BEST Audio player I have found. yes its just Audio player but it does it works as a Boss and is a full fledged audio player. You should give it a try if you want to enjoy better sound quality. 

As I have said above, it is a full fledged music player, it offers tonnes of settings to complete the experience of music. This time we are talking about bass, so we will only focus on bass. First of all download AIMP3 music player using the link below. Don't worry, its just a 7 MB setup file.


After downloading, install it and open settings. To open AIMP3 settings, just press Ctrl+P and you will get the settings page. In Playback settings, select Sound Effects
From the MOD option, select the Surround to Surround Mode 2. 

Now let us go to the final settings page, to get there click on DSP Manger button from the bottom. 
In the second row, second column, you will find bass level, slide the bass level to around 60%, it will be enough to give the effect. As we all know, increasing bass will distort the sound, so we need to maintain an equilibrium within base and music, to do so we will normalize the bass automatically whenever the song has ups and downs.

AIMP3 has a setting for the same, from the same page where you changed the bass, you will find the option for normalizing volume, from there select the second option which says, Normalize by Amplitude and close the settings page. 

Now let us configure the final setting, the old and widely used Equalizer. to open the equalizer, open the main music player window and select the bottom right button (Shown by Red Box), it will slide open equalizer window. Now make the settings as shown in the image below.

Equalizer-Settings-AIMP3

After opening the equalizer, turn on the equalizer, by clicking on the button which is marked as 1 in the image. To check that the equalizer is on and running, the button will show a light of the color of theme.
Now the second slider is of bass level (again), to get heaviest bass slide the button to bottom or top most and to get medium level bass, let it be in center.

After all this experiment I hope you get the bass you expected from the tutorial. 
Now allow me for the next post. If you face any problem in configuring any of the settings, please comment below and I will reply as soon as possible.

A Small Test

To verify and device's performance, we all know that a test is a good method. So I suggest you to play a songs called Harlem Shake, its the most bass preferred song and I tried it on my speakers, it just vibrated the Computer table and it was a win feeling. Ahha, to try this song you need to download this song in a audio format obviously.

Introduction to PC Customization

Who in this pretty good universe hates to be unique? Well I like to be the one who stands out of the crowd and appear as bold and impressive than others and I hope you so do the same. What's the thing that we do not customize? Books, Mobiles, Vehicles and in fact every thing that we own as private. Everyone wants their properties to be eye-catching and whoa styled. Customization can be anything, like sticking Vinyls to your Car, Changing your cell's ringtone or wallpaper, or Theme or if you are a genius than you can also change your cell's boot screen ;-) And the king of all, customizing a PC has many, many and many options to go for. In a PC you can Customize EVERYTHING, but the condition is you must be using Windows platform though. Now in this post I will get into details of PC Customization. (Software)

PC Customization Software

PC (Or Laptop) Customization has four major options to opt for customization and they are, oh wait lets see them one by one :- ). Let us start from scratch, and for sake of convenience, I have titled the level of geekness needed and the risk related to the customization. 

So what's the very first thing you see when you press the power button?

The BIOS Screen 

Level: PRO | Risky: Very Much

The BIOS screen is the very fist thing that you see when you hit the Power button of your PC, not sure what the PC shows in a FBI Computer though! Some Motherboard makers like Asus provide users to change the BIOS screen through a bloatware in the Drivers Disc. Since Many people PC's and dads doesn't allow it, so lets skip this one and move on to next option which is allowed for all PC's having Windows 7 Installed.

The Boot Screen

Level : Average | Risky: Negligibly low

The Booting Screen is the second thing you see when the PC starts. This one is customizable to a good extent. You can change it if you have Windows 7 installed, which is most probably on many of the PC's in this good world. Though it is also possible in Windows XP using Tune Up utilities software but it is very less used and the customization is not helpful in case of Windows XP as you need to use images which will be compressed to ugly 256-Bit based BMP images and you then opt for the default one. 

Now talking about Windows 7 customization with regards of Boot Screen, you can change it very much as you need. The most famous and stable tool made for this purpose is the Windows 7 Boot Updator. The level of risk in this customization is very low because you can edit all the things using a single program on the go and the #Program allows you to create backups of system files and restore them if needed. Even I am using this program and the programs is very reliable.

The Windows 7 Boot screen has two part, static and dynamic. In static part, you can edit the following: The Background Color from 48 predefined colors which is good enough to provide you a choice of colors or you can also change the whole background by defining a image of full colors and this options seems to be more useful. Now coming to text, you can change the following text that you see as "Starting Windows" "©Microsoft Corporation" and after changing the respective text you can change their font size, their position i.e., with respect to space gap b/w the edges and the text color and the color now as more number of choices. 
And if you want a cleaner look, then you can also remove both messages to give just a animation part on a black background.

And now coming to dynamic part, the animation part, you can change the whole animation. If you would like to check out the some example and awesome animations available on Internet, you can visit our Boot Screen Gallery where I have Uploaded some of the best booting animations I have found on the #Internet. Moreover, you can can also create your own booting screen animation by creating 105 different BMP images as parts of animation and copying them inside a folder and then selecting that folder using the boot screen editing tool.
Now after editing the whole boot screen drastically, let us move to the next part which is Login Screen.

Login Screen

Level: Geek | Risk: Low

The Login Screen is the next thing after booting screen and is the intermediate between desktop and booting screen. The Login Screen can be changed in many ways. The Level is geek because you need to deal with system files manually and since the files are system files so there is a risk of system crash in a low extent.

You can customize your Windows 7 Login screen by changing its background ( easy and non risky ) and by changing its other small parts like Messages, lower branding and login forms ( Geeky and risky ). The good thing about customizing login screen as there are many applications available online which will help you change the background of your Login Screen making the task easy and risk-less. One such program is Logon Studio by Stardocks which allows you to edit Logon Screen for Windows XP, Vista and 7.
Download Logon Studios

And if you want to change login forms and other high level things, you need to either edit your system files which are involved in Login Screen using a program named Resource hacker and then replace them with system files. This thing is very professional and risky too.

When you have logged in to your PC, you usually see the very own desktop if your PC is working fine.
Now moving on to next part, and that is your favorite one, the very own desktop.

Desktop

Level: Average | Risk: You can customize your desktop and your friends will kill you if you do not tell'em how to do that.

Desktop is the first thing you customize when you get to use a PC or a laptop. The first thing you do to customize it is by changing its wallpaper to your own face, you cat, dog, your favorite artist or any awesome piece of shit.

But kiddo, time time has changed and it is time to grow up and enhance your desktop to the next level, to the geek level. Changing your desktop wallpaper is not enough, you need to make it alive. Now question comes how to make it more beautiful when you are already using the best wallpaper according to you.

Desktop customizing is fun and you have limitless options for customizing it. The best are Rain Meter and X Widgets. Rain Meter makes your desktop what you never thought of and has thousands of full, free themes available online. The best place to search themes for Rainmeter is DeviantArt and Google. Here is a example of my case. The wallpaper that is currently applied on my desktop was just a group of vertical black bars. Now to renovate the look of my desktop I stumbled upon a good and matching Rainmeter theme for this wallpaper and after applying theme, I got this.

Cool Black Rainmeter Skin

Looks awesome, isn't it? 
P.S. The additional changed that you are seeing in my desktop are usable, I mean that I can see the time from it, open Hard Drives and control my Music player as I want like seeking the track, changing its volume and so on. There are many Rainmeter themes which are made for everyone, you can get a simple minimal to Heavy and detailed themes for more fun.

Now you have seen the power of rainmeter, its time for Xwidgets. Xwidgets, is same as Rainmeter as the collection of Xwidgets gallery has reached thousand of widgets and each and every widget is very promising in terms of customization.  I have already posted abut XWidgets on my blog previously and here is the condition of my desktop when I used it previously.

X Widgets Collection


Read More about XWidgets

Now which one to choose? Rainmeter or X Widgets? Well, if you are asking my choice then I would recommend you Rainmter if you want a complete and perfect layout of widgets and tools.

And if don't wanna mess up your desktop and just want a bunch of useful and stylish widgets, then go for X widgets. You can find exactly what kind of widget you need. Whether its a stylish clock or a RSS feed reader or just a showpiece. 

So the whole desktop customization is managed by Rainmeter and X Widgets somewhat. 
Your PC has booted, Logged and now you at desktop, what's next? Its the Windows Explorer and now the customization is about it.

Windows Explorer

Level: Geek | Risk: Medium

Windows Explorer is what you use to browse your PC in terms of  HDDs, Removable drives, Folders and Files. A non geek user can't use his PC without this application and so it behaves as a most used and important part of Windows. Now when it comes to customization, it is very hard to customize Windows Explorer and it also has some potential risk of system crash as first of all, to customize it, you need to have perfect knowledge of shell level editing and it is risky because you need to replace existing system files with your edition. But even after this, you can't say that this is useless, but in fact if you are able customize this one, then the PC will act like as if a new version of OS is installed and it also completes the combination of Boot Screen + Desktop + Explorer Customization which is enough to regard your PC as the coolest one than the default installed.

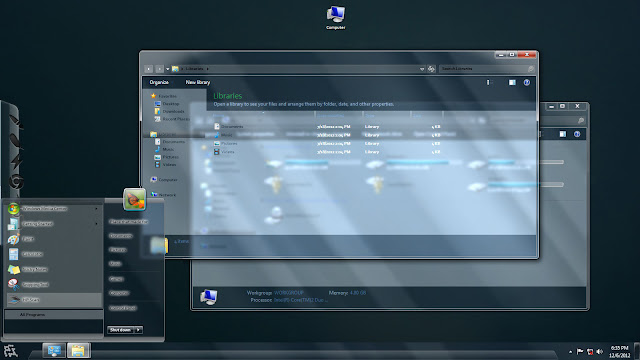
Some geeks around the world practice their geekness and upload modified and cooler version of Explorer related themes. For eg, the glass version of theme by devaintart user Pawan2face looks like this.
Download Theme

Real Aero Glass Windows 7 Theme


So if you want to completely customize your PC, you need to make some customization to Windows Explorer!

Conclusion

Customizing PC is both Fun and Awesome if done properly and careful, but if try to smarten with your PC then you can probably end up with the final option of Re Installing Windows. It takes just a few hours to get a nearly perfect combination of customization. My favorite options are customizing Boot Screen as I have seen some amazing and oomphing Boot Screens to add an eye candy to our PC and some Rain Meter themes that changed my whole desktop to the one that every computer geek will like to adopt.

Sorry I forget to ask, What are the things you do to customize your desktop. Please tell me your favorite Boot Screens and Rain Meter Themes you use and would like to recommend to me.

Please allow me to write next post of our own Blog!
Regards, Anuj Sharma  (Ptmaroct)

Play PS2 Games on PC using PCSX2

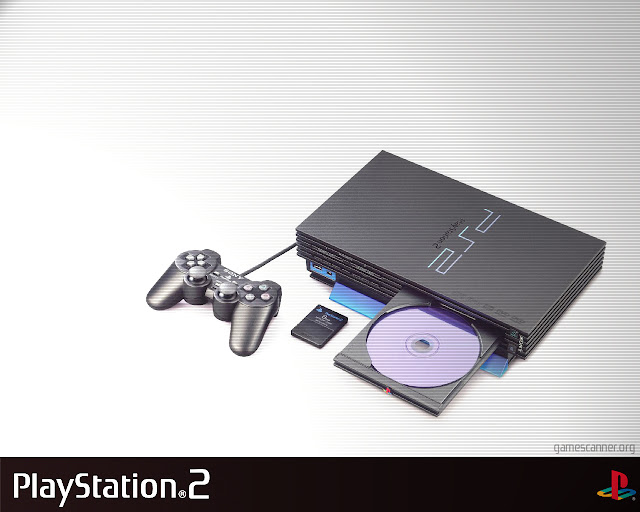
Play Play Station 2 games on PC
Image Credits
Playing hardcore games is every PC users' dream and I have not seen anyone who hates games at all. But is some conditions a gamer might hate a game because of a single reason and that is platform racism. Superb RPG games like God Of War and others are not available for PC platform natively but you can play any Play Station 2 game on your PC if you have a good PC. This has been made possible by a small application named PCSX2 which lets you play Play Station games on your PC as if you are playing them on Play Station. I have found many people who eagerly want to play their favorite Play station game on PC but they end with some kinda errors with their PCSX2. Keeping it mind I have also created a demo video to how you how to configure PCSX2 correctly so that you can start playing your favorite game. Here are the things that you need for playing a Play station game:

Requirements

  1. A Play Station game disc image file ,i.e., God of War.iso or Game.nrg
    Here Godofwar.Iso is the image file of God of war game and .Iso is its format. You must have a Play station game image in order to play it, seems legit. If you don't have one, then you can get it from the Kick or Bay's market.
  2. PCSX2 application
    You need to download the version according to your OS. Fortunately the developers are working hard for all three platforms: Mac OSX, Windows and Linux
  3. Play Station 2 BIOS file
    This one is tricky and you need to extract bios from a real physical play Station 2. Its a small file of 4 MB that is stored in your Play Station and can be extracted using the tool provided by the PCSX2 team. They are asking for the BIOS file as it is needed to run emulator and it also indicates that you are  a genuine and legit player.
  4. Extras: Your system must have all necessary software installed like Direct X must be updated, VGA driver must be updated and your system must be running with any kinda error.
So all we have to do is make this happen:

God Of War 2 on PC gameplay

Starting from scratch

Go to your desktop or any comfortable location and create a new folder named "Project PlayStation 2". In that folder make four folders as follows  : 
  1. Game: In this folder copy a game image file like God of war.iso 
  2. Emulator: In this folder copy the emulator program files.
  3. BIOS: In the third, copy the BIOS file. We will later use this file
  4. Extras: MSVCP100.dll file This file is needed as in most cases the emulator fails to run because of absence of this file.
Download Link for all of above files

Next step


Now you have four folders which are ready to be used for making your game-play possible. So first of all go to emulator folder and extract the file "PCSX2 Emulator-www.Ptmaroct.com.zip" and then run "pcsx2-r5350.exe" from the extracted folder.

WTF an error hits the screen!!

If you get an error saying that MSVCP100.dll is missing from your computer, then you need to download this file and copy it inside the emulator folder from where you ran the main exe file.

And again if the same error hits the screen with the dll file changed to, MSVCPR100.dll, no problem, you can fix the issue again using the same method, just download the file and put it into root folder.

Now the emulator should execute without any problem. Once it opens, keep hitting the next button till the last step and when you are at the last step, you need do the BIOS fie copying.

Now again go to the first time configuration window and click on Refresh List. The BIOS file that you just copied shall be visible in the list. Select the file and click on Finish.

Now you have finished configuring it and a new blue window with a program log windows should appear.

Ah Ah wait, the configuring is not over yet, you still have one task to do and that is configure the keypad settings. Can you play the game without telling it which button does what?

To configure keyboard or gamepad settings:
  • Click on configure and then select  Controllers (PAD) and then Plugin settings.
  • From the top of the window, click on Pad 1
  • Now you will see many buttons' names. To configure an action of that button, first click on it from the window and then press the respective key from keyboard or gamepad. For eg. First click on Square and then press "S" from keyboard. Now S will serve as the square button for the emulator. 
  • You need to configure these buttons: X O [] ∆, D Pad, Select Start and L1 L2 and R1 R2 for an optimal gameplay.
  • Now the final step is to load the game. Click on "System" from the menu bar and click on Boot CDVD "Fast" and then tell him where is the game located. You shall start playing now.
    The reason I told you to choose fast is that if you choose "Full" then it will show Play Station Boot Screen, Select your language and asks you to set time. You can skip this using the fast boot method.

Video Tutorial to Play Playstation2 Game

As I promised you that I will add a video recording demonstrating all the above steps involved, but the video is under processing and still to be uploaded. the video will be ready within 1 day. So keep visiting to check if I have added it.

Frequently Asked Questions 

Here are the answers of the top questions that any user might face meanwhile using PCSX2:

Why the hell the game is running too slow!

This is the most common question among most PCSX2 users. There are many reason. Here is my explanation for the cause. PCSX2 creates a virtual play station 2 based environment to make gameplay possible. Whenever we  use two different environments simultaneously, we are ought to feel the lag as a simple Home PC isn't meant to do these kind of hard core tasks. Moreover, a perfect emulations is only possible on a good config PC. For Example: If a game made for PC gives you 100% performance, then the same game made for PS2 running on PC will give you only 70% of performance. This is because of high usage of CPU, GFX and RAM.
Jokes apart, you can turbo charge your gameplay using a simple hack. If gameplay in your PC is now of 15 to 20 FPS (Frames Per Second ), Then you can boost your gameplay to 50-55 FPS using a simple hack. Here are the instructions to boost your gameplay:
  1. From PCSX2 window, run any game and during gameplay, Press the F4 key. This will disable frame limiting and thus making it possible to achieve higher FPS.
  2. Now go to PCSX2 Window and then click on Config from the menu bar. Now select Emulation settings. In the window just opened, click on Speed Hacks from the top. Now from this window, enable everything, move the scroller to rightmost and then click on OK.
    DO NOT enable the setting named " MTVU (Multi Threaded Micro VU1) " if you do not have a Quad Core CPU. Even if you have a quad core CPU, leave this setting or you might end up in trouble.
Now run the game and you must feel a increase in FPS, enjoy you game :-)

The emulator can't find MSVCP100.dll 

This error is very common even if your PC has C++ run-time installed. To fix this error, just download this file and place it in the emulator folder along with all core files. 

Author's Note

I hope you utilized my tutorial and you are able to play Play Station 2 game yourself as for now. You are always welcome to ask me anything if you face any error, or if you have any suggestion for me or just a simple vote of thanks. Good bye for now and keep visiting my blog :-)